Sunday, September 16, 2012

Easy Lady Beetle Nail Art!

Hi everyone! I have a cute little design that's super easy to do - lady beetles!


So in Australia at the moment InStyle magazine is giving away two different butter London polishes with their latest issue and I picked up a gorgeous red called 'Pillar Box Red':


*Lady beetle not included :-) I found that little lady beetle when I was clearing out a box the other day and I thought it would make a super cute nail design. Anyway, we pay at least $20 to buy butter London polishes from authorised retailers! And for $8.95 to get a butter London polish included is an awesome deal. I don't own many reds so this makes a nice addition to my collection:


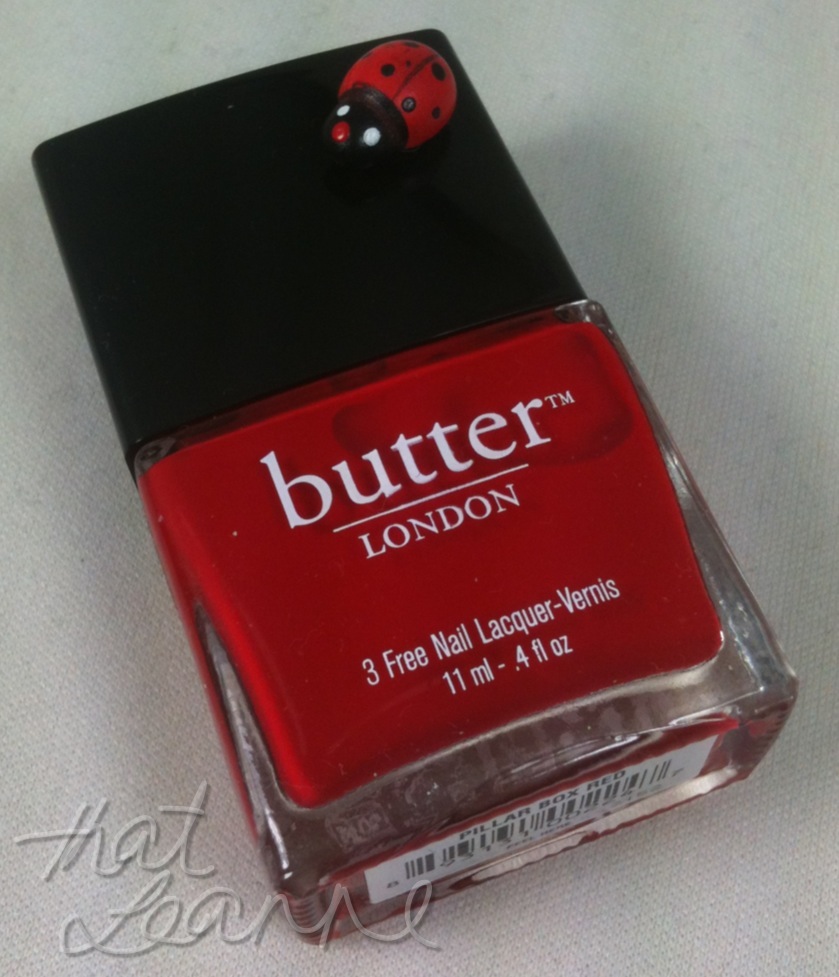
This polish is simply gorgeous. It's a little runny to apply so be careful around the edges but I only needed one coat!


As usual not much is needed - I prep with Sally Hansen Vitamin E Nail & Cuticle oil and use the Double Duty Base & Top Coat. I used three nail art tools - a hard wide brush to clean around the edges of my nails with Acetone, a small nail art brush to paint the lines and face, a dotting tool and two more colours, an opaque black and white polish.


So this design doesn't take that long to do I promise! The hardest part is probably trying to get a straight line down the nail in step 2 shown above. The curved head in step 3 is simply outlined with the nail art brush then filled with the polish brush (a mini bottle helps with smaller areas). Step 4 alternated between the large and small ends of the dotting tool. You can also apply less polish or gently dot to get a variety of sizes.


The last two steps are super easy - step 5 is a little tricky if you use a nail art brush to get that oval shape but I think you could also use the dotting tool and drag the colour around to make a bigger circle. Step 6 simply uses the dotting tool to dot the two eyes on each nail and hey presto you're done!


Kudos to the bf for taking this last picture and patiently listening to my Hipstamatic app instructions ;-) I have been running around the house like a crazy girl with my hands extended going 'lady beetle power raaaaaaaaaaaah!' Too much nail polish fumes perhaps :-P I really like this design but since I was copying my little beetle decoration I thought of different things I could have done afterwards - perhaps there needs to be a lady beetles part 2 down the track here! Anyway I hope you enjoyed this look and try it out for yourself. See you next time!


Sunday, September 2, 2012

Minnie Mouse Bow Nail Art!

Hello everyone! *insert face of shame*. Well. Apparently I needed a break and perhaps I'm still on one but I couldn't resist sharing today's efforts. I picked up the OPI Vintage Minnie Minis from David Jones a few weeks ago and while I've made a few posts on Instagram (my latest obsession) I did my first nail art in months today.


All photos were taken and edited on my phone (I have an old crappy iPhone 3GS but I love it to bits) so excuse the quality.


This is the original colouring / no filter version. Unfortunately there was no "anti-aging/anti-winter cracked fingers filter" :-(


The Minnie minis set contains 3 Minnie polishes and a mini top coat. Yep, a RapiDry instead of the gorgeous glitter polish with heart glitter that I had to go buy separately. Poor form OPI. I purchased a full size of the glitter and the pink used in the second photo:


Left to right we have The Color of Minnie (a shimmery red used in the bows for this nail art), If You Moust You Moust (opaque bubblegum pink also used as a base for my nails), I'm All Ears (a pink/red shimmer) and a RapiDry. I have full sized If You Moust You Moust and Nothin' Mousie 'Bout It (pale pink glitter with heart confetti). While I'm on the subject of the heart confetti, I *knew* it would be a pain to work with from my experience with the Nicole by OPI version, but it was pink and pretty so I had to have it.


So today I felt like sponging and this is what I was working with. A dotting tool, two nail art brushes (the bigger one for cleaning up the nails and fingers), a makeup sponge, 3 OPI colours (The Color Of Minnie, Alpine Snow and If You Moust You Moust), acetone and a make up remover pad.

Steps 1-4

I started with the thumb before I changed my design - originally I sponged The Colour of Minnie at the bottom of my nail but I decided I liked the white contrast better. I always draw the outlines of my bows first. Even though it takes so long I always do them the same - outline then fill, then fill again! I'm not very good at sponging but I'm determined to practise!

Steps 5-8

By about step 7 I'm shaky and cranky but it's all worth it in the end!


I couldn't resist a creepy Minnie shot ;-) I picked her up in Disneyland last year and had no idea she would be so useful for nail art! Anyway I hope you enjoyed the nail art, and I hope you all have a lovely week!

P.S. If anyone is interested, the iPhone apps that I used to make this blogpost were Hipstamatic, PicFrame, Picfx and A+ Signature. I took SLR photos but I really am lazy so they are still on my camera...


Related Posts Plugin for WordPress, Blogger...